Showing posts with label Missile Launcher. Show all posts

Thursday, April 24, 2014

Ork Looted Leman Russ - WIP

Out here in the Valley of the Sun the heat of Phoenix Arizona can have some unexpected results.  Say for example you leave your Imperial Guard army in your car one day, after a late night of wargaming.  You may return to your car in the morning to find that your Leman Russ has melted, yes... melted.  So what does one do with a horribly warped Leman Russ?  Make it a looted wagon of course! Any critiques and suggestions are welcome.  I think I'm about done with the tank itself. I am working on making some grots out of green stuff to man the sponsons and a large ork to command the tank. 


Tank traps are mounted to front of the tank using a couple of I-beams.  A battle cannon was scratch built from styrene tube and is removable to allow for weapons swaps.  An oil drum has been converted into a rocket launcher.

A deck is added to the rear end of the tank for transport.  The exhausts are rerouted around the deck.

A lascannon power pack powers a spot light. Bits of worne styrene are 'riveted' about the sides of the hull and used to decorate the front of the track guards.

Green stuff was used to create weld lines, styrene rods were bent using the heat of cigarette lighter, and guitar string connects a spotlight to the turret.

Guitar string and Imperial Guard flamer packs were used to detail the engine compartment.

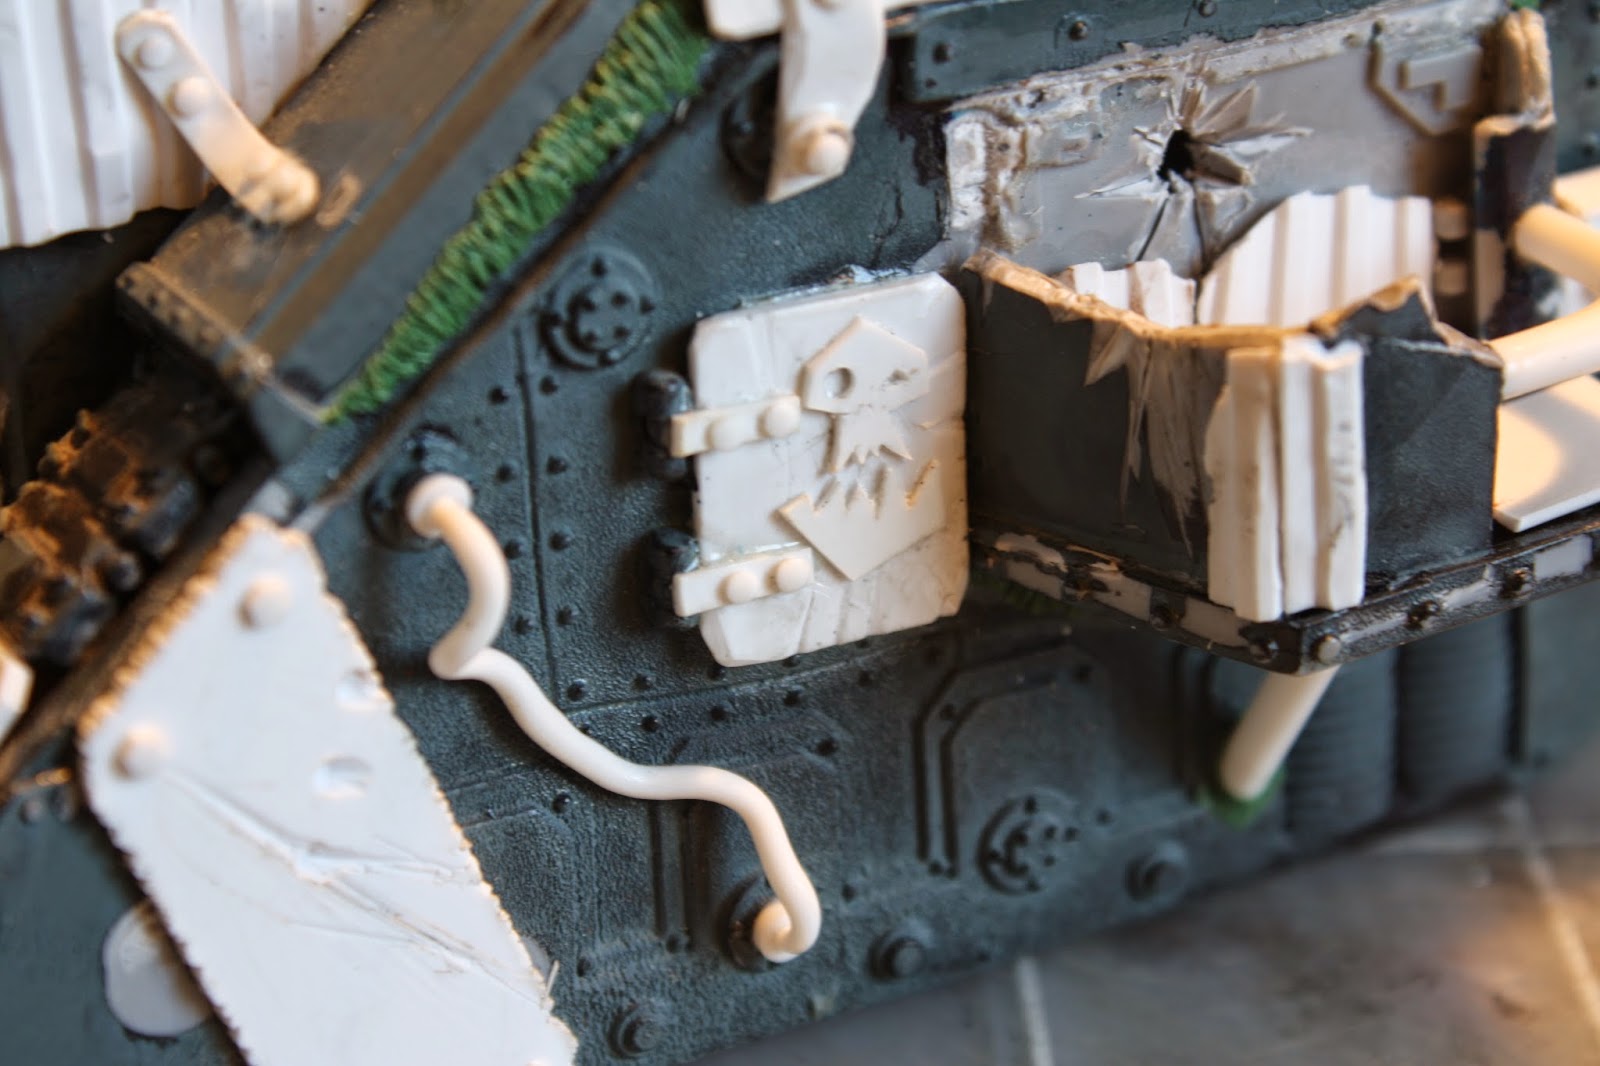
Using some orky pictures for reference, I cut a few ork icons out of thin sheets of styrene.

A great deal of the wear and tear inflicted on the styrene was achieved by chewing on it between my molars.

Here I swapped the driver's position and forward weapon.  I tore apart one end of a styrene tube and further bent the ends after warming them with a lighter to represent an exploded cannon barrel.

Sunday, February 9, 2014

Hobby Progress - Imperial Guard - Catachan Regiment

I have a tendency to purchase more plastic crack than I can possibly finish at any given time.  That isn't such a bad thing considering how distracted I get by random new projects.  I spent this last week getting some of my Catachan army completed.  All models were painted with a combination of GW, generic craft paints, and Army Painter paints and washes.
Imperial Guard Commissar with Plasma Pistol
The above commissar was missing his left arm when I got him in some bits I had ordered from ebay.  I fixed that with a generic Cadian arm, a chainsword, and for the epaulette, some green stuff.

Catachan Lieutenant

Imperial Guard Commissar

Catachan Heavy Bolter Team

Catchan guardsmen with lasguns and meltagun

Catachan Captain with Powerfist and Boltgun

left: custom 'Sly' Marbo   Right:  Catchan guardsman with plasma gun
I'm thinking about painting Marbo's berrett red to keep with the theme of the Catachan 2nd regiment.

three catachan missile teams
The sandbags for the missile teams and the heavy bolter team are resin casts of some sandbags I made a long time ago out of super sculpey.

Saturday, October 26, 2013

Custom Space Wolf Dreadnought #1

My first dreadnought was a vanilla marine I picked up off of ebay for about $10.  My goal was to turn it into a Space Wolves Dreadnought.  To accomplish this I used a combination of Apoxie Sculpt, Green Stuff and a little tough love.

I began by removing the paint with Super Clean.  This normally works very well but will sometimes not remove black primer.  In this case it worked well enough to move on.

I used Apoxie Sculpt for all fur, and Green Stuff for more minute details. In this photo you can see one of the furs on the first Dreadnought.  I use dental tools to sculpt the fur.

I also went about magnetizing the Dreadnought and the arms so that I can change up my list to meet specific threats.

You'll notice that there is still some paint on these.  I soaked them in Super Clean for a couple of days and what you see left is the tough stuff that stained the plastic.


The Lascannon received a Green Stuff wolf icon. The hash marks help the Green Stuff adhere to the plastic. I then spread a ball of GS across the side of the lascannon and carved out the wolf using a x-acto knife and dental tools.

The Missile Launcher got the same treatment.  I also added a bit of small chain to the missile launcher. I got this from Michael's craft store. Check out their jewelry section. There are a lot of great necklaces that can be used as chain and power cords.

The legs of the dreadnought were missing the shin guards.  I fixed this by cutting a piece of styrene tube to length and then cutting it in half.  I applied those to the front of the legs and finished them off with some more Apoxie Sculpt fur and a Green Stuff banner.  I "Wolfed up" the feet by cutting notches into the toes and cutting some sprue into claws.


For the classic wolf skull and cross bones I created a push mold of an original using Apoxie Sculpt and used that to press a Green Stuff duplicate.

A coat of Wolf Grey primer and base coat from The Army Painter  really starts to pull it all together.

Next came paint. I don't have any in process pictures but the colors used were Wolf Grey, Dragon Red, Greedy Gold, and Weapon Bronze, from The Army Painter as well as various craft paints.  The mechanical details were blackened out out and then dry brushed with Games Workshop Boltgun Metal.  I used The Army Painter washes for shadows and Secret Weapon Miniatures pigments for rust/weathering.  The base was flocked with Army Painter snow and some other snow flock I had on hand.

Tada!
Space Wolf Dreadnought 1

Space Wolf Dreadnought 2

Space Wolf Dreadnought 3

Space Wolf Dreadnought 4

Space Wolf Dreadnought 5