Sunday, July 6, 2014

Space Wolves Rhino


Today I finished my first Space Wolves Rhino. I ordered some Space Wolves iconography from Forge World which I am using to adorn all of the 4 rhinos I'm working on. I also added some antenna to the rear of the vehicle as I think any military vehicle looks incomplete without one.


For a special touch I created a stencil from an image I found after doing a google image search and using my airbrush I created a mural on the roof of the rhino.

I made sure to detail the interior too. I used a gloss varnish to add some shine to the screens and buttons.


Here you can see some of the Forge World iconography as well as some standard Games Workshop decals and some freehand painting. The chipping effect was achieved using a sponge and Army Painter gun metal.

For weathering I used oil paints thinned with mineral spirits. This wash was applied to each rivet and allowed to wick into all the crevices. Some Secret Weapon Miniatures 'Terracotta Earth' weathering powder was applied to the treads and secured in place with mineral spirits.

The soot effects were created by crushing artists charcoals which I then applied with a brush. I added additional highlights to the edges of the model with the side of a #2 pencil.

Sunday, June 22, 2014

Space Wolves Rhinos - WIP

I've started work on 4 Space Wolves Rhino APCs.  I started with the interiors first, base coating them in a black primer and following up with a dry brushing of Citadel Colour Chainmail. I then detailed the control panel.  I finished the interior with a gloss varnish on all the screens and lights.


I have finished the interior of all 4 and have begun work on the exterior. Using florists wire I added grab handles to the rear of each rhino. I ordered some Space Wolves icon sets from ForgeWorld and applied those to each hull before base coating them all in Wolf Grey base & primer from Army Painter. I based the side doors in Army Painter Daemon Yellow, and masked off some sections of the hull and based them in yellow as well. Aside from the base colors of grey and yellow I wanted to add some quality ornamentation.

I decided to create my own stencils to paint some ornamentation worth of the Space Marines. I started by making an impromptu lightbox with my desklamp and a sheet of plexiglass. Be careful when using incandescent lamps as I managed to significantly warp my plexiglass in the process. Using my lightbox I traced some iconography out of the Space Wolves codex onto a piece of masking tape.  I also printed out some more graphics I found online. With a hobby knife and some stencil sheets, I bought at a craft store, I cut these graphics into stencils. CLICK HERE for a tutorial.


On two of my rhinos I used the Army Painter Daemon Yellow primer/base coat to paint the medieval style wolf.

On another rhino I used one of my stencils, and a $10 airbrush from Harbor Freight, to create this:
I started by spraying black primer, from a distance, over the back half of the rhino. After that dried I set one of my stencils in place using Easytack and masked off the rest of the model.  I then sprayed the white, removed the stencil, and from a distance, sprayed white around the black areas to add the 'stars' in the black of night.  I will have to continue to clean up the rest of the model but I'm quite happy with the results so far.

FINISHED - Click here for my post with the finished models.

Saturday, June 21, 2014

Imperial Guard Chimera

Catachan 2nd Company APC

After playing a game of 7th Edition 40K against a 30K Imperial Fist army I decided that my IG were in desperate need of armoured transport.  My choice was a Chimera.  It has been marked for the Catachan 2nd.  Those familiar with the fluff will recognize this as Colonel 'Iron Hand' Straken's company. 

Unfortunately I didn't have a camera handy for many of the steps in this build but I will do my best to explain my process.


First I made two tread guards for either side of the chimera. I created these out of sheet styrene and rounded them off with some modeling putty. I trimmed the ends with a thin strip of styrene and added pre-made rivets for detail. For added texture and detail I added some plastic netting to simulate metal tread plate. Not only does this give me a nice custom look and adds some real world detail, it saves me a lot of tank tread which I can use at a later time.

I also added some accessories from a Tamiya 1/35 scale accessories kit.

I wanted a heavy weathering effect on this model so I began by laying down a coat of rust colored primer. After that had dried I airbrushed a coat of AK interactive Heavy Chipping Fluid.  After that had dried I air brushed a series of Tamiya Acrylics: Nato Green, Nato Brown, Dark Yellow, and Flat Black.  Once that had dried I began chipping the camo pattern by rubbing a toothpick over the edges and other areas of heavy wear.

I followed up the chipping with additional wear by sponging on some Army Painter Gun Metal along the edges and other areas of heavy wear.

I also added army decals and rub on transfers which I chipped at with a toothpick.

I created a couple of mounting brackets for a shovel. These were made out of brass photo-etch scraps. The shovel I had in my bits box turned out to be a little too short so I cut of the spade and hilt and replaced the handle with a piece of styrene rod.

I applied a wash of oil paints (black and burnt umber mixed with Mineral Spirits) to each of the rivets, in all the grooves, over the details and across all the tread. Using a brush slightly dampened with mineral spirits I dragged the wash downward to create streaks of rust and grime. I picked up any extra wash with a toothpick.

Once the oil paints had dried I followed up by applying rust colored weathering powders from Secret Weapon Miniatures. These powders were applied by brush with mineral spirits.  I used the same process to apply dirt colored powders to the tank treads.

After I was satisfied with the weathering powders I applied MIG Fresh Engine Oil to the hubs and pistons to simulate leaking oil and grime. I also used the side of a pencil to highlight some of the sharp metal edges and the details of the tread.


I colored the lens of the viewports with a base coat of apricot followed by a coat of Tamiya Clear Red.


I created an exhaust effect by brushing a charcoal powder around the exhaust vents on either side of the chimera. I made the charcoal powder by filing down a piece of artists stick charcoal. This material should be readily available at any art store and is very inexpensive.

The interior was a bit more rushed and not as detailed.  I did however include a detail kit which I made out of styrene and green stuff, molded in silicone, and cast in resin.  I think it looks a great deal better than the bare interior that the kit comes with.


I magnetized the main turret weapons, except for the optional flamer.  I don't intend on using it and if I should change my mind later I will put one together.


Overall I'm pretty satisfied with the result.  I had nearly completed the dozer blade when my dog ate it.  It is still partially intact so I plan on piecing it back together later. I still feel like something is missing and I welcome any critiques or comments.


Thursday, April 24, 2014

Ork Looted Leman Russ - WIP

Out here in the Valley of the Sun the heat of Phoenix Arizona can have some unexpected results.  Say for example you leave your Imperial Guard army in your car one day, after a late night of wargaming.  You may return to your car in the morning to find that your Leman Russ has melted, yes... melted.  So what does one do with a horribly warped Leman Russ?  Make it a looted wagon of course! Any critiques and suggestions are welcome.  I think I'm about done with the tank itself. I am working on making some grots out of green stuff to man the sponsons and a large ork to command the tank. 


Tank traps are mounted to front of the tank using a couple of I-beams.  A battle cannon was scratch built from styrene tube and is removable to allow for weapons swaps.  An oil drum has been converted into a rocket launcher.

A deck is added to the rear end of the tank for transport.  The exhausts are rerouted around the deck.

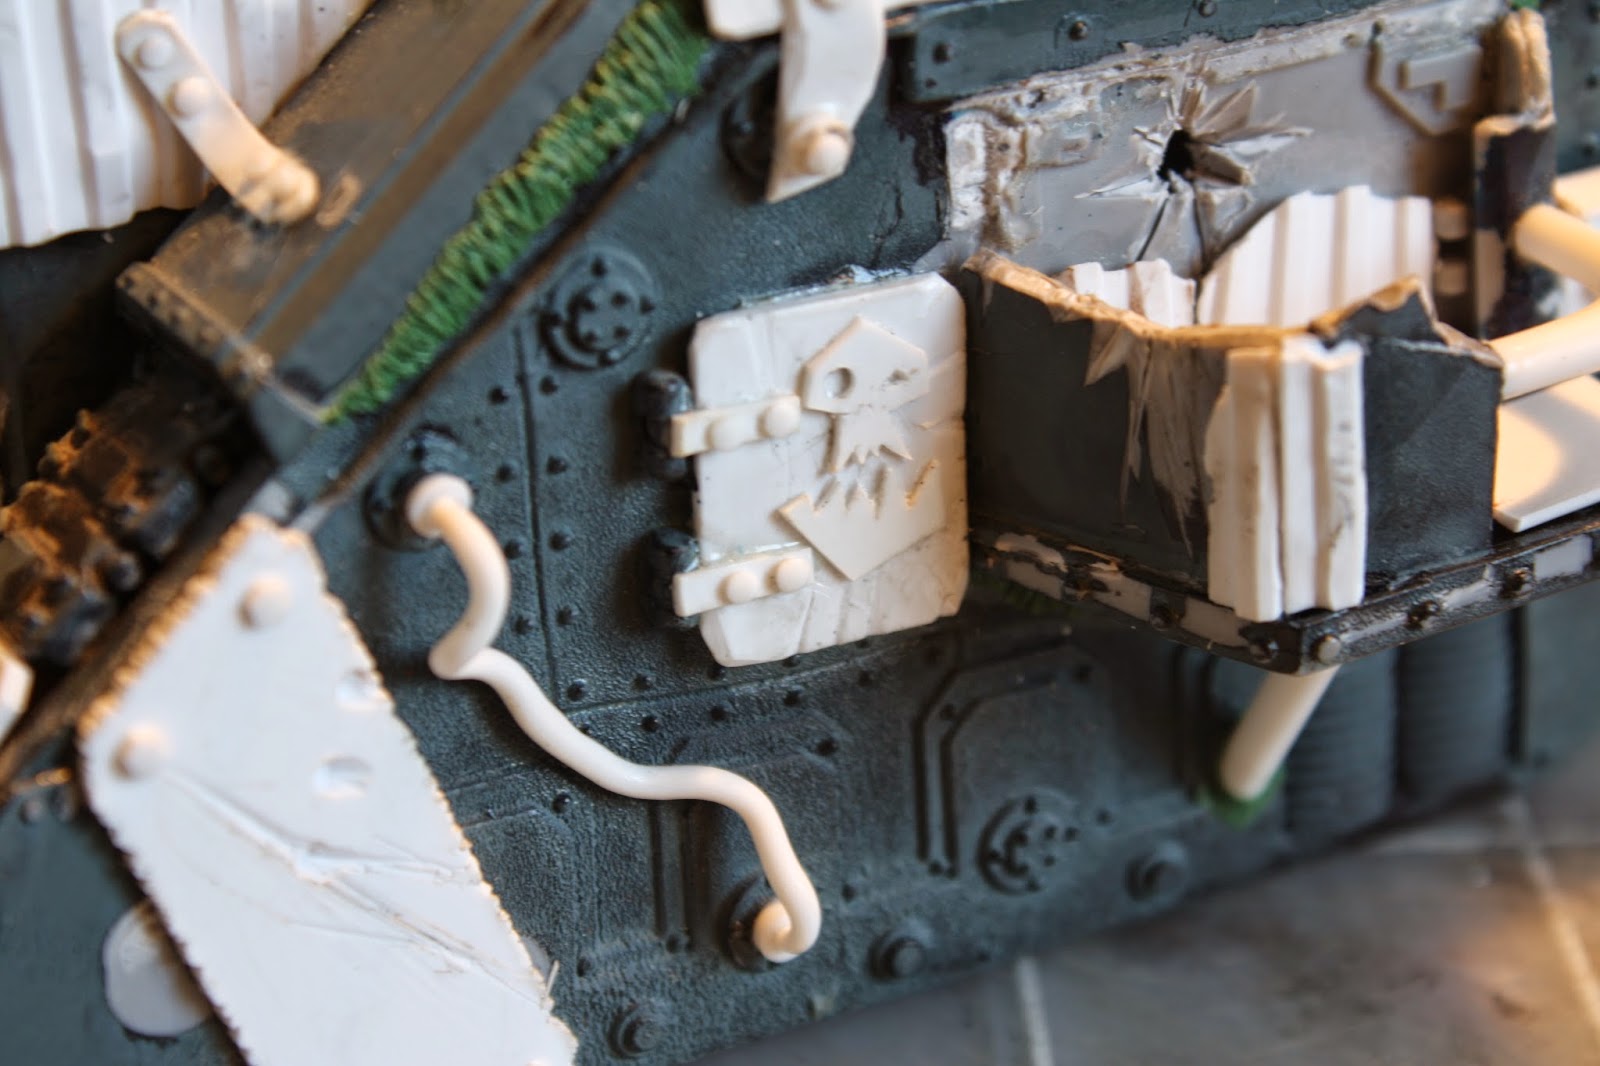
A lascannon power pack powers a spot light. Bits of worne styrene are 'riveted' about the sides of the hull and used to decorate the front of the track guards.

Green stuff was used to create weld lines, styrene rods were bent using the heat of cigarette lighter, and guitar string connects a spotlight to the turret.

Guitar string and Imperial Guard flamer packs were used to detail the engine compartment.

Using some orky pictures for reference, I cut a few ork icons out of thin sheets of styrene.

A great deal of the wear and tear inflicted on the styrene was achieved by chewing on it between my molars.

Here I swapped the driver's position and forward weapon.  I tore apart one end of a styrene tube and further bent the ends after warming them with a lighter to represent an exploded cannon barrel.

Tuesday, April 22, 2014

Tutorial - Plasma Cut Texture


Working on Orkifying a looted vehicle or want to add some repairs to battle damage on your vehicles?  You may want to give the illusion that a piece of metal was cut to size with a plasma cutter.  Here I will show you how I get that unique texture that a hand held plasma cutter will leave behind.

For this project you will need a hobby knife and some sheet styrene.  I prefer a thickness of 1mm or thicker for this.  You could use a thinner sheet but the texture we are trying to achieve will be less pronounced and harder to read.

Start by cutting off a piece of styrene to your desired size.  Perhaps you are covering a hole or adding additional armour to a tank.  Either way, make sure the piece is cut to the size and shape you want for the final piece as any resizing done later will negate all the work you did to create the texture.

Using your hobby knife, make a series of cuts running perpendicular to the styrene. I do this by tapping a fresh blade along the sides of the styrene. Do so with a slight angle and a random spacing. These cuts should not go very deep, perhaps a quarter of a millimeter. Continue this around the circumference of the piece.

Next, repeat the technique but with an opposite angle to your strokes.  As you do this you should start to see little pieces of styrene get cut away revealing slight grooves around the sides of the piece.

Repeat this process until you achieve the desired result.

Here are some examples of this technique applied to a looted Leman Russ I'm working on.


Sunday, April 20, 2014

Tutorial - Bolts and Washers


Whether one is detailing Imperial Guard... excuse me, Astra Militarum vehicles, building terrain pieces, or Orkifying some looted vehicles, details such as bolts and other fasteners are essential to bringing a finished look to your model.  Here I'll demonstrate a technique I've used to create bolts with washers.

To complete this project you will need the following:
  • hole punch (with multiple size dies)
  • hobby knife
  • sheet styrene
  • hex stock (hexagonal extruded styrene)
  • glue (plastic weld prefered over super glue)
Use your hole punch to make "washers".  Make sure that the size die you are using is larger than the hex stock.  For added detail make two sizes of "washer" for each fastener, one slightly larger than the other.

Using your hobby knife cut thin slices off of your hex stock.  These should be roughly the same thickness as the sheet styrene you used for the washers.

Here is an example of the two discs and one slice of hex.  These will become our bolt and washers.


Stack the pieces largest to smallest, using a dab of glue between each.  It is easier to place these if you apply the largest piece to the model first and then glue the remaining pieces one at a time on top of each other.  Below is an example of what the above process looks like when applied to a Grot Tank I'm working on.

Don't stop there with various sizes of extruded hexagonal styrene, styrene rod, and your hole punch, you can make all kids of different fasteners.  In the above picture, very small styrene rod was used to create rivets and a different sized hex stock was used to create additional bolt heads.